By November 1914 the Bns had been divided to form 'Service' and 'Reserve' battalions. The main function of the 'Reserve' battalion was to train new recruits for the 'Service' battalion (for when it was finally deployed overseas) and to continue with home defence. Both battalions were billeted in Blyth, Northumberland, however, staff of the reserve battalion based at the Hexham depot continued to recruit and train new personnel. Early in 1915, after an Army reorganisation, the Service battalion became known as the 1/4th (1st line battalion) and the Reserve battalion as the 2/4th (2nd line battalion). For a few months the 2/4th battalion continued to recruit and train men for the 1/4th, but after a further reorganisation it became part of the 188th Bde, 63rd (Home Service) Division. During Nov 1916, the 2/4th was transferred to the 72nd Division, but continued with home defence duties.
The 3/4th battalion was formed at Hexham during Jan 1915 to continue with the recruiting and training role, however, after another reorganisation in April 1916 the 3/4th became the 4th (Reserve) Battalion and in September 1916 the 5th, 6th and 7th (Reserve) Bns were absorbed by the 4th Reserve Battalion.
An infantry Bn in 1914 was usually comprised of a HQ and eight companies (coys). A full strength coy was as follows:
1 x Captain (Capt)
2 x Lieutenant (Lt) or 2nd Lt
1 x Colour Sergeant (Col Sgt)
2 x Sergeant (Sgt)
2 x Drummer/Bugler
5 x Corporal (Cpl)
100 x Private (Pte)
2 x Driver (Pte)
3 x Batman
Northumberland Infantry Brigade
(Numbered 149th Inf Bde on 12 May 1915)
HQ - Newcastle-on-Tyne
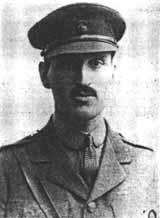
OC - Brigadier General James Foster Riddell
was comprised of the:
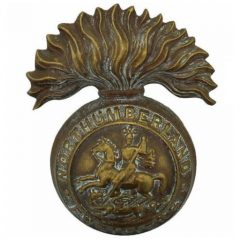
4th Battalion - Northumberland Fusiliers
5th Battalion - Northumberland Fusiliers
6th Battalion - Northumberland Fusiliers
7th Battalion - Northumberland Fusiliers
Select links to learn more about these Battalions
Return to Divisional organisation
4th Battalion - Northumberland Fusiliers
HQ - Hexham
CO - Lt Col A.J. Foster
November 1914
The Companies (Coys) of the 4th Bn were:
'A' Coy - Hexham
'B' Coy - Bellingham
'C' Coy - Haydon Bridge
'D' Coy - Prudhoe
'E' Coy - Corbridge
'F' Coy - Haltwhistle
'G' Coy - Newburn
'H' Coy - Prudhoe
Note: During Jan 1915, the battalion was reorganised to form four companies. 'E' Company amalgamated with 'A', 'G' with 'B', 'F' with 'C' and 'H' with 'D'.
Select links to learn more about these Companies
5th Bn - Northumberland Fusiliers
HQ - Newcastle-on-Tyne
CO - Lt Col A.H. Coles
November 1914
'A' Company (Coy) - Walker
'B' Coy - Walker
'C' Coy - Walker
'D' Coy - Wallsend
'E' Coy - Wallsend
'F' Coy - Wallsend
'G' Coy - Gosforth
'H' Coy - Gosforth
6th Bn - Northumberland Fusiliers
HQ - Newcastle-on-Tyne
CO - Lt Col G.R.B Spain
November 1914
'A' Company (Coy) - St Georges Drill Hall, Northumberland Road, Newcastle?
'B' Coy -
'C' Coy -
'D' Coy -
'E' Coy -
'F' Coy -
'G' Coy -
'H' Coy -
7th Bn Northumberland Fusiliers
HQ - Alnwick
CO - Lt Col R Scott
November 1914
'A' Company (Coy) - Morpeth
'B' Coy - Ashington
'C' Coy - Belford
'D' Coy - Alnwick
'E' Coy - Amble
'F' Coy - Alnwick
'G' Coy - Berwick on Tweed
'H' Coy - Berwick on Tweed
63rd (2nd Northumbrian) Division comprised the 188th, 189th and 190th Bdes.
The 188th (2nd Northumberland) Brigade - Comprised of the 2/4th, 2/5th, 2/6th and 2/7th Bn - Northumberland Fusiliers.
The 189th (2nd York and Durham) Brigade - Comprised of the 2/4th Bn - East Yorkshire Regt, 2/4th and 2/5th Bn - Yorkshire Regt. 2/5th Bn - Durham Light Infantry.
The 190th (2nd Durham Light Infantry) Brigade - Comprised of the 2/6th, 2/7th, 2/8th and 2/9th Bn - Durham Light Infantry.
72nd Division comprised the 215th, 216th and 217th Bdes.
The 215th Brigade - Comprised of the 28th, 70th and 81st Provisional Bn.
The 216th Brigade - Comprised of the 83rd Provisional Bn, 14th Bn - King’s Own Yorkshire Light Infantry and 10th Bn - Somerset Light Infantry.
The 217th Brigade - Comprised of the 2/4th, 2/5th and 2/6th Bn - Northumberland Fusiliers.