Chapter 3a – Armentieres

Historical Context - the “City of the Linen”. By the turn of the century Armentières, in the Artois region of Northern France, was an important centre of textile, printing, dyeing and brewing industries. It…

You must be logged in to view the content of this Chapter.

Passchendaele

24th Oct 1917

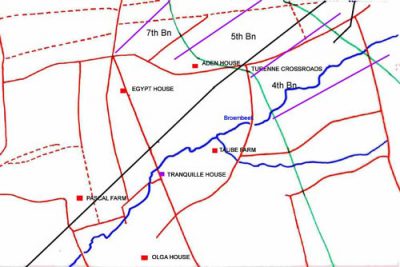
On the night of 24th the 149th Bde relieved units of the 34th Division south of the Houthulst Forest and astride the Ypres to Staden Railway line. The 4th Bn moved into trenches in the right sub sector and the 7th Bn the left sub sector.

25th Oct 1917

At 8.31am Operation Orders for an attack were received from Brigade HQ.

4th Battalion War Diary

APPENDIX X A
OPERATION ORDER NO. 1A.

1. The 149th Infantry Bde will attack on the morning of the 26th inst, 4th NF on the right, 5th NF in centre and 7th NF on left, - 57th Div are attacking on our right, with 4th/5th Loyal North Lancs as their left battalion.

2. The battalion will attack on a 3 company frontage each company being on a platoon frontage.

‘A’ company on right, ‘B’ company in centre and ‘D’ company on left. ‘C’ Company will be in reserve on a 2 platoon frontage.

3. (a) Platoons will leap frog and capture and consolidate the objectives already given them i.e. FIRST WAVE to HUTS, SECOND WAVE to line V.2.3.1.6 – V.2.c.5.1. THIRD WAVE to final objective V.2.a.3.0 to V.2.d.15.55.

(b) Reserve company will move forward with attacking waves to a point approximately 200 yards west of the HUTS.

(c) ‘A’ company will detail parties to obtain touch with battalion on their right at the following points.

(a) Concrete shelter at V.8.a.1.8.

(b) Ditto at V.2.c.4.1.

(c) ROAD BRIDGE at V.2.d.0.6.

4. Two machine guns will accompany 4th wave of ‘B’ Company.

5. Two Stokes Mortars1 will be attached to ‘C’ company and will be available to fire at any strong points holding up the attack.

6. Barrage will begin to creep forward at ZERO + 8 minutes and will creep at the uniform rate of 100 yards in 8 minutes throughout. Lifts will be at 50 yards at a time.

7. Taping out of the assembly trench will be carried out under an officer from Battalion HQ. One line of tape will be laid from the Railway Embankment at point V.1.d.0.2. to V.7.b.6.5. Two guides will be left at the end of the tape on Railway Embankment. A short length of tape will be laid at right angles to assembly tape to mark the left of ‘D’ company, short lengths of tape will be laid at right angles to assembly tape every 130 yards to mark company frontages. The assembly tape marks position of leading wave.

8. ‘A’,’C’ and ‘D’ companies will move forward to assembly positions at 7pm tonight each company providing its own covering party. ‘B’ company will withdraw to the assembly tape at 11pm. Completion of assembly will be notified by code word ARRAS, sent by runner to battalion HQ.

9. 1 contact aeroplane will be flying over companies front at zero + 1 hour 30 mins and at zero + 3 hours heading troops will show their position to contact aeroplane only when called for

(a) by Claxon horn

(b) by series of white Very lights dropped from the plane.

10. RAP will be at PASCHAL FARM 2.

11. PRISONERS 1 man as escort to 5 Bosches

12. Reports will be forwarded to battalion HQ at TAUBE FARM 3 as frequently as possible and at least once in the first hour after zero.

13. Battalion HQ will open at TAUBE FARM at 7pm tonight.

14. Zero will be at the fall of the barrage. Time of this will be notified later, also synchronisation of watches.

15. General compass bearing of attack 55 degrees magnetic.

16. Acknowledge.

Issued at 1.30 pm
Copies to CO ‘A’, ‘B’, ‘C’ and ‘D’.

4th Battalion War Diary

CORRIGENDA TO OPERATION ORDER NO 1A

1. Owing to the swampy state of the ground on the right of our attack, it has been decided to attack on a 2 Coy frontage instead of a 3 Coy frontage. ‘B’,’C’ and ‘D’ companies will have dispositions exactly as laid down in O.O. no 1A.

2. ‘A’ company will NOT go to the assembly tape but will move from TRANQUILLE HOUSE 4 to TAUBE FARM at 9pm tonight, when they will be in battalion reserve.

3. Hot tea and rum will be brought up tonight 1 guide per company to be at TAUBE FARM at 11pm to guide carrying parties.

4. Acknowledge.
Issued at 2pm
Copies to CO, ‘A’,’B’,’C’ and ‘D’

The CO reported the change to Bde HQ:

25th Oct 1917

Communication between Bn HQ and the front line was extremely difficult as the route was under direct observation and subject to incessant shelling by the Germans. This was especially so on the line running parallel with the road north-west and south east of Tranquille House, because it appeared to be an enemy barrage line. There was no cover except for shell holes, so it had not been possible to lay a telephone wire, or for a visual signalling system to be established.

Two runners did manage to reach the front line coy and all operation orders were delivered safely. However, it was a close call, because they had mistakenly overshot the front line by at least fifty yards and had been stopped before they stumbled on the enemy.

Front line company were constantly shelled by our own Howitzers, and some casualties resulted.

At 7pm Bn HQ moved forward to Taube Farm and the R.A.P 5 moved to Paschal Farm from Olga Houses 6.

Between 7 and 9pm coys moved forward to their assembly positions.

The attack formation was altered twice in 12 hours. The original intention was, to attack on a 3 coy frontage, each coy being on a platoon frontage in depth, in 4 waves (1 platoon in each wave). After the relief it was realised that with the swampy ground on the Bn right flank, there would only be room for a two coy frontage. The CO reported this to Bde HQ (Appendix B).

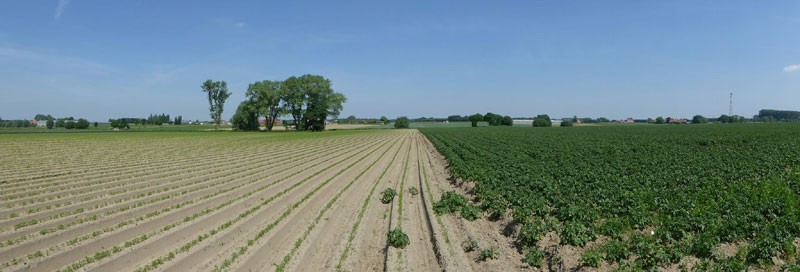
Battlefield looking north from Poperingstraat
Battlefield looking north from Poperingstraat (Image courtesy of Mr A McCaffrey)

4th Battalion War Diary

APPENDIX B

L.T.3. CO’s report. “From reports received from the 11th SUFFOLKS," the right of my Battalion front is a swamp. Even if it is possible to assemble the right company, I do not consider they would be able to advance, but would have to be dug out. I propose with your permission to attack with two companies.only in the front line, one in support, and to keep the fourth company in reserve in TRANQUILLE HOUSE area. Conditions on rest of the front are such that if a man steps off a firm piece of ground into the slightest hollow he has to be dug out. There are very few firm pieces of ground away from the Railway and Roads.

Map 1 - 149th Brigade positions

25 Oct 1917

Summary of events

When 2nd Lt J.A. Burton actually laid the tape, he realised that there was only sufficient room for an attack frontage of one coy. Therefore, the front line platoon frontage was cut accordingly to one coy, the second coy was positioned to the rear of the right hand coy of the 5th Bn with instructions to wedge between the 4th and 5th Bn Coys at the front once the attack started. The third coy was held in reserve about one hundred yards to the rear of the front line coy (on a two platoon frontage) and the fourth coy under the Bn Cdr was positioned at Taube Farm and Tranquille House.

The Coys assembled in shell holes and dug-in, in the formation described above. A piece of tape was laid to mark the boundary between the 4th and 5th Bn. Hot food was packed in hay and carried up to the coys at the assembly points.

A leap frog system of attack, recently practised in training, was to be employed. The lead platoon was to take the first objective, the second platoon was to pass through to take the second objective, the third platoon the final objective. The fourth under the company commander were to be used for counter attack or consolidation according to the tactical situation.

26th Oct 1917

At 3am heavy rain began to fall again and at 4.05am the 4th Bn reported it was in position for the attack.

At zero hour, 5.40am, the barrage opened up and began to creep forward at a rate of one hundred yards every eight minutes. The fusiliers of the149th Bde rose to their feet to advance behind it, with the 4th & 5th Bn Loyal North Lancashires (57th Divn) on the right flank and the 35th Divn on the left. Had the 'going' been good, the troops who lay close up under the barrage (so close indeed that several casualties were suffered) waiting for the first "lift", would not have had a problem advancing at the rate of the creeping barrage.

'The rain had, however, done its deadly work, for all the gallant fellows could do was to drag themselves along through the thick clinging mud and water at a much slower pace than the barrage, which soon got ahead'. Then form "pill box" and shell hole murderous fire was poured upon them. Many fell dead; some of the wounded fell into the gaping holes of water and were drowned; fortunate were those who escaped, but on went the survivors' [zotpressInText item="{4R6FADJ9,244}"]

The allied barrage consisted entirely of shrapnel and was therefore quite useless against the first objective, which consisted of concrete huts. To make matters worse the rain continued to fall heavily and the condition of mud and water were perfectly appalling.

Bn HQ received a wire from the Bde Major at 8.50am stating that a wounded Forward Observation Officer had reported that the first objective had been taken and the men were advancing well to the second objective. This information proved incorrect because 2nd Lt Wood subsequently returned wounded and reported that casualties were heavy and the attack was held up in front of the Huts. The attack had actually ground to a halt about eighty yards west of the line of huts. The machine gun fire and sniping was so severe that any further advance was quite impossible and reporting the situation back to HQ extremely difficult. Two runners were sent to the front line to try and gather information but they both failed to return.

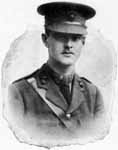
Captain J.C Gregory
Captain J.C Gregory

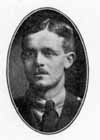
At 11am, 2nd Lt Burton was sent forward to reconnoitre and he confirmed that the attack was held up about one hundred yards short of the Huts. At 1pm Sgt Thompson returned from the front line and confirmed 2nd Lt Burtons’ report stating that casualties were very heavy. Similar news was brought down later by Capt J.V. Gregory. This information was relayed to Bde HQ by pigeon and signaled by Lucas Lamp. Several messages were sent during the afternoon. Ttwo platoons from the Reserve Company, under the command of 2nd Lts Peddie and Scott, were sent forward at 6pm to consolidate the original line held before the attack.

2nd Lt F.G. Peddie
2nd Lt F.G. Peddie

The Bn was relieved about midnight by the 4th Bn East Yorks and proceeded, via the duckboard track known as Railway Street 7, to Rose Crossroads camp 8. The 6th Bn DLI organised straggler posts in likely places to round up men returning from the front line and to guide them to camp.

Roll call revealed the appalling casualties suffered by the 4th Bn. 2nd Lts D.A.Smith, and W.Ruddy had been killed in action with 2nd Lt R.A.A Simpson later dying of wounds. 2nd Lts G.R.Charlewood, A.W.P.Leary, H.B.Bell, J.R.Ruddock and R.Wood were wounded, and 2nd Lt R.G.Rayner and H Stobbs were missing. Thirty-six fusiliers had been killed, one hundred and fifty-six wounded and sixty four were still missing. A total of two hundred and fifty six, more than fifty percent of those that had gone into action. The 5th Bn fared even worse with a total of 12 officers and 439 men either killed, wounded or missing. 7th Bn losses amounted to 11 officers and 246 men.

Summary compiled from:

[zotpress items="WPX27IS4" style="harvard1"]

[zotpress items="HUXKQ9EA" style="harvard1"]

[zotpress items="4R6FADJ9" style="harvard1"]

Casualties

Records show that at least 100 fusiliers from the 4th Bn were actually killed in action or died of wounds between the 25th and 27th of Oct 1917. For information on 4th Bn burial and memorial sites for casualties sustained in this battle, select the link.

4th Battalion War Diary

The following is a list of points noted in the attack:-

1. Two machine guns were attached to the battalion in the attack. They went forward with the support company (in rear of 5th Bn) and did excellent work.

2. Two Stokes Mortars were to be attached but did not succeed in getting ammunition forward.

3. Communication to Bde exceptionally valuable and wonderfully maintained under a heavy barrage by the Bn. Signalling Officer (2nd Lt W.C.Clemitson) and the other signallers. The wire to 5th Bn almost instantly maintained, visual to Bde also kept up although the lamp was knocked over three times, and pigeons.

4. Wounded. Appalling difficulty in getting wounded as the slightest movement in the front line was checked by Machine Guns and sniping.

5. Liaison. Lt W.B. Hicks acted as liaison officer between the 4th Bn and the Bde on the right flank. Liaison with the 4th/5th Loyal North Lancashires maintained through 5th Northd Fus, who had an officer from that battalion with them.

6. Rations Cannot be brought up by transport in these conditions. Men must carry two days rations and also two Tommy cookers.

7. Kit as laid down appear the best, though many packs will probably be thrown away.

8. Hot food should always be carried up to the troops the night before the attack - also RUM.

9. Guiding appallingly difficult owing to the scarcity of landmarks, obvious landmarks, such as the railway are dangerous as the enemy naturally concentrates his artillery on them. We suggest a double line of pickets with plain wire on them. This is not conspicuous and very helpful.-

4th Battalion War Diary

APPENDIX C

(i) MESSAGES during the action

L.T.19 timed 12.20pm. Wounded officer left company reports attack on huts in V.1.D held up by many machine guns about 150 yards west of Huts. Right company held up in same position. Right company of SEED (5th NF) held up on same line. Impossible to work round flanks owing to swamp on right and machine guns on left. AAA. I have one company still in reserve in TAUBE FARM and TRANQUILLE HOUSE area AAA I do not propose to make another frontal attack with this company, as this appears to me to be a reliable report. AAA the officer states that Huts are very little damaged and full of machine guns AAA. Unless I receive orders to the contrary I will move Reserve Company up tonight at dusk to take over and reorganise front line AAA. Am investigating this information and will report later. AAA Ground very swampy and casualties very heavy in wounded officers company.

LT.20 timed 12.40pm In continuation of my L.T.19 I am unable to reach front line companies owing to machine gun fire and sniping from Huts and concrete emplacements. South of Huts. AAA There is not the slightest doubt that the whole attack is held up 100 to 150 yards west of Huts. I am unable to ascertain definitely position of troops on my right but they do not appear to have made much progress. AAA I am unable to estimate casualties.

LT 21 timed ? A very reliable Sgt has just brought back a report from front line. He states that 50 of our men and 2 officers are lying about 100 yards west of middle of Huts. Remainder of 3 companies, he thinks, are casualties. Total about 300. BOSCH planes have been flying low over front line shooting at them. Bosches have also sniped majority of our wounded as they tried to get back. Attack started in excellent order and was clear of BOSCH barrage before it came down – a few men succeeded in reaching HUTS but have not come back. Remainder caught by machine gun fire from HUTS and both flanks. Can you please give me assistance of large party to get our wounded out tonight with stretchers. It requires about 6 men per stretcher.

LT 22 timed 3.44pm Ref B.M.871

I am sending up 2 platoons tonight at dusk. They will consolidate original front line held before the attack and remaining 3 company’s will withdraw. I should like to send them out of the line. Is this possible please, and can staff captain arrange billets for them (probably 70 or 80 men). If the other company is not to be relieved, could you send water, rum, hot food and rations up for them and battalion HQ. Guides could meet ration parties and stretcher parties at PASCHAL FARM. I should also like a large carrying party with stretchers. Guides as above. – Sent by pigeon and substance of it by visual.

149th Bde War Diary

Speaking generally, the Bde was ordered to attack in a north-eastern direction between the southern border of the Houthhulst Forest 9 and the Broembeek 10 on a frontage running in an irregular manner through Aden House 11, and the principal objectives included "Hill 23 12," "Colbert Crossroads 13" and the groups of huts about seven hundred yards south-west of Schaap Balie 14. Aeroplane photographs were unfortunately not very clear, but they revealed an area that was capable of an obstinate defence, and one that might be rendered impassable by heavy rain. The chief obstacles were a double row of concrete huts or "pill-boxes," and ground that was already dangerously full of water- holes.

Heavy rain began to fall again at 3am and the "very few firm pieces of ground" became less in number; the water, trickling at first down the muddy sides of shell holes, soon became small streams, filling the occupants of the shell holes with gloomy prospects of success in the attack; pools of water widened almost to small lakes. Even in the darkness it was possible to discern stretches of water out in No Man's Land across which the attackers would have to pass.

2nd Passchendaele - Military Units

34th Division Comprised of the 101st, 102nd and 103rd Infantry Brigades

The 101st Bde - Comprised of the 15th and 16th Bn - Royal Scots, 10th Bn - Lincolnshire Regt and 11th Bn - Suffolk Regt.

The 102nd Bde - Comprised of the 20th, 21st, 22nd and 23rd Bn - Northumberland Fusiliers.

The 103rd Bde - Comprised of the 24/27th, 25th and 26th Bn - Northumberland Fusiliers.

35th Division - - Comprised of the 104th, 105th and 106th Infantry Brigades

The 104th Bde - Comprised of the 17th, 18th, 20th & 23rd Bns - The Lancashire Fusiliers.

The 105th Bde - Comprised of the 15th & 16th Bns - The Cheshire Regiment, 14th Bn - The Gloucestershire Regiment and the 15th Bn - The Sherwood Foresters.

The 106th Bde - Comprised of the 17th Bn - The Royal Scots, 17th Bn - The Prince of Wales' Own, 19th Bn - The Durham Light Infantry and the 18th Bn - The Highland Light Infantry.

50th (Northumbrian) Division Comprised of the 149th (Northumberland) Bde, 150th (York & Durham) Bde and 151st (Durham Light Infantry (DLI)) Bde.

The 149th Bde comprised of the 4th, 5th, 6th and 7th Bn Northumberland Fusiliers.

The 150th Bde comprised 4th Bn East Yorkshires, 4th Bn Green Howards, 5th Bn Green Howards and 5th Bn Durham Light Infantry

The 151st Bde comprised the 6th, 8th, 9th Bn - DLI and 1/5th (Cumberland) Bn - Border Regt

The 149th MGC -

57th (2nd West Lancashire) Division -

The 170th (2nd North Lancashire) Bde - Comprised of the 2/5th Bn - King’s Own, 2/4th, 2/5th & 4/5th Bn - Loyal North Lancashire Regt.

The 171st (2nd Liverpool) Bde - Comprised of the 2/5th, 2/6th, 2/7th & 2/8th Bn - King’s.

The 172nd (2nd South Lancashire) Bde - Comprised of the 2/9th & 2/10th Bn - King’s, 2/4th & 2/5th Bn - South Lancashire Regt.

Tyne Cot Cemetery
Tyne Cot Cemetery (Image courtesy of Mr A McCaffrey)

.

.

Second Battle of the Scarpe

Summary of events

With the exception of the 4th Bn (ordered to move to the old German line north of Beaurains) and two sections of the 149th MGC who were to support the attack of the 150th Bde, the 149th Bde was to remain in billets at Ronville 2 and Guemappe 3 was taken. The 4th Bn reached Buck Trench 4, and the Divn frontline was advanced to a point not far from the outskirts of Cherisy 5. HQ was established at Telegraph Hill 6

www.fairmile.fsbusiness.co.uk/odellarras.htm.

23rd April 1917 (St Georges Day)

At 4.15am the front line Bns were reported in position. The 150th Bde attack was to be carried out by the 4th Bn East Yorkshires on the right and the 4th Bn Green Howards on the left. Five minutes before Zero hour two tanks nosed their way to the front and moved slowly in a north-westerly direction.

At 8am the Bn moved forward again to the O.G. 1st line (map ref: N.5.b) and remained there during the day at half an hour notice. The Bn moved forward at five minutes notice at 7.45pm to the Brown Line 7 and for tactical purposes came under the orders of the GOC 151st Bde.

During the early morning of the 24th the 151st Bde relieved the 150th Bde, who moved back into reserve in the Harp area 8; the 4th Bn were attached to the 151st Bde, the remainder of the 149th being in support.

At about 11.30am, the enemy was reported retiring in front of the 30th Divn, and the GOC of the 30th Divn stated that he was going to push on to the Blue line 9.

Wancourt

The Bn moved forward from the Brown Line under the orders of the 151st Bde. ‘B’ Coy were sent forward to the front line and came under the orders of the 5th Bn DLI. They dug and occupied a new trench connected to the right flank of the 9th Bn DLI. Their covering party captured four Germans. No contact was made on the right flank until 3pm at which time communications were established with the 5th Bn Border Regt who were to the rear and slightly right of them. The 5th Bn Borders agreed to come forward at night and dig and occupy a trench that would be connected with ‘B’ Coy on the left.

‘A’, ’C’ and ‘D’ Coys and Bn HQ arrived at the old British front line north of Wancourt Tower (dispositions as per sketch) 2.30am. Rations were brought up to the 5th Bn Border HQ in the Long Lane 10 and brought up to ‘A’, ‘D’ and HQ by ‘C’ Coy. There was insufficient time to deliver rations to ‘B’ Coy before daylight so the men had to consume their second lot of iron rations. ‘B’ Coy were subjected to continuous, heavy shellfire and persistent sniping. 2nd Lt R Johnson and five men were killed and 16 men were wounded.

('B' Coy or the Bn) Lewis Guns identified good targets at ranges varying round 1000 yards and inflicted several casualties on the enemy. One Lewis gun was destroyed by shellfire. The areas occupied by the remaining Coys were also subjected to considerable artillery fire, which was especially violent between 2.30am and 7am and again between 1.30pm and 2pm. No direct hits were obtained on the trench and no casualties were sustained in this line during daylight.

2pm A part of ten stretcher-bearers and ten men were sent out to collect wounded still lying on the battlefield.

The GOC 151st Bde was instructed to advance at 4pm under an artillery barrage. But, meanwhile, the 30th Divn had already reached the Blue line, and was digging in on it, and the 151st Bde was, therefore, ordered to conform immediately to the movement of the 30th Divn. The 5th Borders Regt swung up their right flank and obtained touch at about 4pm. But the 9th DLI, in the centre, with a Coy of the 4th Bn attacked, and had a sharp tussle with the enemy before occupying the Blue Line 11. (50th Divn)

3pm ‘B’ Coy under 9th Bn DLI orders (2.25pm) went forward one platoon to reconnoitre and capture an enemy trench 600 yards long astride the railway. The platoon captured the trench sustaining three casualties in the process.

Bn HQ received Operation Orders at 3.30pm stating that the 15th Divn were advancing on the left and 9th Bn DLI would support their advance with rifle, Lewis Gun and MG fire. Also that they would push forward patrols to reconnoitre and capture the German trench six hundred yards long astride the railway. OC 9th Bn DLI detailed ‘B’ Coy for this work and captured and held the trench as described above.

At 5.22pm 4th Bn HQ received a wire from OC 9th Bn DLI stating that one of the 'B' Coy platoons had just captured an enemy trench (from map ref: O.20.7.6. to O.20.C.1.9) and was holding it. Only three casualties were incurred. Fine piece of work. Lt Col B.D. Gibson and 2nd Lt Burton went forward to reconnoitre the new positions occupied by ‘B’ Coy and ‘A’ and ‘D’ Coys.

Another platoon was sent forward under heavy artillery and machine gun fire to help hold it. Under cover of darkness one more platoon of ‘B’ Coy was sent forward to the trench and three strong points were constructed, two north and one south of the railway. [zotpressInText item="{4R6FADJ9,}"]

10pm ‘A’ and ‘D’ Coys dug a new support trench between the railway and the Cojeul River and occupied it. One machine gun was attached to each Coy. At 10.30pm Bn HQ moved to a dugout at the old German gun pits at the north end of old German support line between Cojeul River and the railway. ‘C’

2nd Scarpe - Military Units

15th (Scottish) Division - Comprised of the 44th, 45th and 46th Infantry Brigades

The 44th Bde - Comprised of the 9th Bn - Black Watch, 8th Bn - Seaforth Highlanders, 8th & 10th Bns - Gordon Highlanders, 7th Bn - Camerons.

The 45th Bde -Comprised of the 13th Bn - Royal Scots, 6th & 7th Bn - Royal Scots Fusiliers, 6th Bn - Camerons, 11th Bn - Argyll and Sutherland Highlanders.

The 46th Bde - Comprised of the 10th Bn - Scottish Rifles, 7th & 8th Bn Kings Own Scottish Borderers, 10th & 11th Bn - Highland Light Infantry, 12th Bn - Highland Light Infantry.

30th Division - Consisted of the 89th, 90th and 91st Bde.

The 89th Bde comprised of the 17th, 18th, 19th and 20th Bns - The Kings Liverpool Regiment

The 90th Bde comprised of the 16th, 17th, 18th and 19th Bns - The Manchester Regiment.

The 91st Bde comprised of the 20th, 21st, 22nd and 24th Bns - The Manchester Regiment.

50th (Northumbrian) Division Consisted of the 149th (Northumberland) Bde, 150th (York & Durham) Bde and 151st (Durham Light Infantry (DLI)) Bde.

The 149th Bde comprised of the 1/4th, 1/5th, 1/6th and 1/7th Bn Northumberland Fusiliers

The 150th Bde comprised 1/4th Bn East Yorkshires, 1/4th Bn Green Howards, 1/5th Bn Green Howards and 1/5th Bn Durham Light Infantry

The 151st Bde comprised the 1/6th, 1/8th, 1/9th Bn - DLI and 1/5th (Cumberland) Bn - Border Regt.

149th MGC -

Bibliography

[zotpress items="HUXKQ9EA" style="harvard1"]

[zotpress items="4R6FADJ9" style="harvard1"]

Categories

Gird Trench, Hook Sap

12th November 1916

‘B’ and ‘C’ Coys moved into Snag Trench 1 and Snag Support 2, ‘A’ Coy to Abbaye Trench 3 and ‘D’ Coy the Flers Line 4. The Bn was warned to be ready for an assault on Hook Sap 5. Lt Col. Gibson visited the front line system of trenches and reported that the communication trench was impassable in many places and the condition of Snag front line and support was extremely bad.

Snag Trench was 6ft wide and it was almost impossible to move along. In several instances men had become completely stuck in the mud and took over an hour to be dug out. Rifle fire was fairly heavy during early morning of the 12th. The German 5th Bn Grenadier Guards were now in the trenches opposite the Bn and were much more active than the Saxon Regt who were opposite on the previous tour in the trenches.

At 7.45am the enemy front line very heavily shelled.

At 10am the Bn received word that the attack on Hook Sap was postponed until the 14th and would be carried out by the 6th and 7th Bns. Work continued on Snag new support trench. Front line system was heavily shelled during the morning with the Bn suffering about twenty casualties with several men temporarily buried as well.

13th November 1916

Orders were received stating that the 1st Divn would relieve the 50th Divn between the 17th and 19th of November.

At 6.30pm, Bde HQ issued an operation order, detailing the 5th Bn to attack on the right flank and the 7th Bn on the left. The 4th Bn were to be held in support with two Coys in Hexham Road 6 and two in the Flers Line (with 5th Bn Green Howards attached). The 6th Bn were to hold the front line from the left of the 7th Bn to the Bde Boundary on the left and support the attack with Lewis Gun and rifle fire.

During the night of the 12th/13th Snag new support trench was dug and completed and Pioneer Alley 7 was cleared as far as possible. To make it passable approximately two hundred duck-boards were laid cross wise in Snag Trench.

At 5.45am a Chinese barrage 8 was laid down on Hook Sap and the Gird Line 9. With the artillery suddenly opening and the barrage steadily creeping forward, it gave the Germans the impression that an infantry assault was in progress.

'This of course, alarms the Bosche, who thinks we are coming over, and brings down all his artillery barrages too. These bombardments took place at 6am for several days’ [zotpressInText item="{ZZCPTDHK,76}"]

Enemy retaliation was very severe especially on Hexham Road 10, where an intense barrage was put up for an hour. Bn once again had several casualties from shell-fire.

The relief of the Bn by the 5th Bn commenced at 8pm, ‘C’ and ‘D’ Coys moved back to the Flers Line, but ‘A’ and ‘B’ Coys remained at Hexham Road. The relief was completed at 11.45pm.

the 5th and 7th Bns moved into position during the night ready to attack Hook Sap and the Gird Line at 6.45am.

‘The position was now as follows. The 1st Divn had pushed the enemy back to a line running along the top of a ridge running from the Butte of Warlencourt practically due east. This ridge prevented our seeing the enemy’s approaches and support position in Le Barque. On the other hand from Loupart Wood the whole of our approaches and support trenches were in full view of the enemy, as far back as High Wood. Across these two miles no one could move in daylight without being seen by the enemy, and there was practically no position to put our field guns forward of High Wood. The enemys’ front line consisted of two trenches - Gird Line and Gird Support - with a forward trench on top of the ridge, called on the left ‘ Butte Trench and on the right ‘Hook Sap’. Our front line Snag Trench and Maxwell Trench lay this side of the ridge and about two hundred yards away from the German forward trench’. [zotpressInText item="{Z5UXG9XQ}"]

‘The Butte of Warlencourt was a round chalk hill, rising about one hundred feet above ground level; and had been mined with deep dugouts and made into a formidable strong point. From the Butte, machine guns defended the approaches to Hook Sap, and the Hook Sap and the Gird line, machine guns defended the approaches to the Butte. The ground between and around the opposing trenches had been ploughed up with innumerable shells, some of huge calibre, and it was now a spongy morass, difficult to cross at a walk and impossible at a run. As events proved, unless both the Butte and the Gird Line could be taken at the same time, the one would render the other impossible to hold. This then was the problem that faced the 50th Divn, a problem that would have been difficult enough in the driest of weather, but rendered four times more so by the rain which fell in deluges on three days out of four during the whole of October and November’. [zotpressInText item="{Z5UXG9XQ}"]

‘A’ and ‘D’ Coy were in Hexham Road and ‘B’ and ‘C’ Coy in the Flers Line when the 5th and 7th Bns went ‘over the top’ to attack Hook Sap, alongside troops from the 2nd Australian Divn. On this occasion mist obscured the attacking troops from the troops in the Flers Line. The enemy defensive barrage was very prompt, opening up within two minutes of zero hour.

The 19th Australian Bn in conjunction with the 5th and 7th Bns took Gird Support. However, the trench was waterlogged, so they fell back to Gird Trench. The 7th Bn appeared to have taken Hook Sap, but they came under severe fire from Butte Trench and nothing more was heard from them. The day wore on and counterattacks were fought off. Two Coys of the 20th (New South Wales) Bn attempted a move against the Maze at 4.45pm but were stopped by machine gun fire. [zotpressInText item="{XGEW4MF2,156}"].

At 10am Capt R.W. Cranage was slightly wounded by piece of shrapnel in Flers Line.

On receipt of this news a sap was begun running out from Snag Trench to Hook Sap, the men digging hard. This sap was begun by 'D' Coy of the 4th Bn, who had been detailed for the work in operation orders. But at 11.30am they had to cease digging as the enemy machine gun fire was too heavy (50th Divn)

‘D’ Coy, under the orders of the 7th Bn, proceeded from Hexham Road to the head of Pioneer Alley to continue this Communication Trench towards Hook Sap. Machine Gun fire was so heavy that the party returned to Hexham Road.

At 2.35pm ‘A’ Coy was placed at the disposal of the 5th Bn. At 5pm 2nd Lt T. Bonner and fifty men reinforced the Gird Line on right (held by 5th and 7th Bns) with bombs and occupy left flank portion of line next to enemy. This party was engaged in heavy bomb fighting all next day.

3.30pm Trenches .

CO moves to Hexham Road to meet GOC 149th Bde

At 5pm ‘B’ and ‘C’ Coys move up to Hexham Road. ‘D’ Coy moves up to Snag trench front line.

At 6.30pm ‘B’ Coy moved to Snag trench to dig a Communication Trench from the head of Pioneer Alley to Hook Sap. ‘C’ Coy moved to Snag left of Pioneer Alley. Capt J.W. Robinson (OC ‘B’ Coy) was killed while leading a patrol reconnoitring Hook Sap.

At 11pm Lt Col B.D. Gibson and Maj N.I. Wright (5th Bn) went forward to reorganise the front line prior to an attack. For this task they had one Coy from the 4th and 7th Bns on the left and another Coy from the 4th Bn and the remains of 'A' Coy from the 7th Bn about thirty men.

The two coys in Starfish Trench went forward and occupied positions in Prue Trench vacated by the 7th Bn, who had gone further forward. Later in the day these Coys were recalled as the 7th Bn were returning there. The Bn expected to be relieved that night, but at 3pm orders were received that stating the the 4th and 7th Bn should relieve the Durhams in the front line. The 4th Bn relieved the 8th Bn DLI and 5th Bn Borders. The weather and the mud was appalling and a large number of bombs had to be carried forward, so the men were absolutely exhausted. The relief was not completed until about 9am on the morning of the 3rd.
15th November 1916

Trenches, Hexham Road & Snag Trench

At 12.30am the 4th and 5th Bns launched an attack but owing to intense enemy barrage and heavy rifle and Machine gun fire the attack failed. Capt J.W. Robinson and 2nd Lt F.J. Larken were killed, Lt Col B.D. Gibson and 2nd Lt T. Bonner were wounded and 2nd Lt A.V. Berrick was missing.

At midnight a detachment of the 4th and 5th Bns attacked on the other flank and similar results were achieved. (McCarthy. p.156).

At 2am the Bn was ordered to reorganise and defend Snag Trench. Lt Col Gibson and Wright returned to Bn HQ as nothing more could be done for the present.

Enemy shelling fairly heavy all day.

16th November 1916

The Bn, including the party in the Gird Line, was relieved by the 4th Bn East Yorks and moved back to the Flers Line. The Bn War Diary shows that the operations between the 14th and 16th of November resulted in the 4th Bn suffering 21 men killed, 62 wounded and 5 missing.

On the afternoon of the 17th the Bn was relieved by the 10th Bn Gloucesters (1st Divn) and move back to Bazentin Le Grand 11.

At 12 noon on the 18th the Bn proceeded by rail to Albert and was billeted in Felix Faure.

Casualties

Records show that at least 40 fusiliers from the 4th Bn were killed in action or died of wounds during the fighting for Gird Trench and Hook Sap. For information on 4th Bn burial and memorial sites for casualties sustained in this battle, select the link.

Gird Trench, Hook Sap - Military Units

1st Division - Comprised of the 1st, 2nd and 3rd Infantry Brigades.

The 1st Bde - Comprised of the 10th Bn - Gloucestershire Regt, 1st Bn - Black Watch, 8th Bn - Royal Berkshire Regt and 1st Bn - Queen’s Own Cameron Highlanders.

The 2nd Bde - Comprised of the 2nd Bn - Royal Sussex Regt, 1st Bn - Loyal North Lancashire Regt, 1st Bn - Northamptonshire Regt and 2nd Bn - King’s Royal Rifle Corps.

The 3rd Bde - Comprised of the 1st Bn - South Wales Borderers, 1st Bn - Gloucestershire Regt, 2nd Bn - Welsh Regt and 2nd Bn - Royal Munster Fusiliers.

Pioneer Battalion - 1/6th - Bn Welsh Regt.

50th (Northumbrian) Division - Comprised of the 149th (Northumberland) Bde, 150th (York & Durham) Bde and 151st (Durham Light Infantry (DLI)) Bde.

The 149th Bde was comprised of the 1/4th, 1/5th, 1/6th and 1/7th Bns - Northumberland Fusiliers.

The 150th Bde was comprised 1/4th Bn - East Yorkshires, 1/4th & 1/5th Bn - Green Howards and 1/5th Bn - Durham Light Infantry.

The 151st Bde was comprised the 1/6th, 1/7th, 1/8th and 1/9th Bns - Durham Light Infantry (DLI). 1/5th (Cumberland) Bn, Border Regt.

Bibliography

[zotpress items="WPX27IS4" style="harvard1"]

[zotpress items="Z5UXG9XQ" style="harvard1"]

[zotpress items="HUXKQ9EA" style="harvard1"]

[zotpress items="4R6FADJ9" style="harvard1"]

[zotpress items="53JCQRAK" style="harvard1"]

[zotpress items="XGEW4MF2" style="harvard1"]

.

.

Chapter 2d – Wulverghem

Wulverghem The following morning the officers reconnoitred the front line east of Wulverghem village in readiness for the Bn moving up to the trenches later that day. Foster: “All CO’s and Captains of Companies…

You must be logged in to view the content of this Chapter.